
You don’t need a pricey gym membership or a set of weights to start building upper-body strength—just your own body. Whether you’re tight on time, space, or equipment, bodyweight arm exercises offer a surprisingly powerful way to challenge your muscles and improve functional strength from wherever you are.
And no, “just” using your body weight doesn’t mean it’ll be easy. “Think about how time completely stops when you’re holding a plank,” says fitness coach Corrine Carnation, CPT. “When your arms start to shake and you’re wondering how something so simple can be so hard—that’s the beauty of it.” These no-equipment moves can not only sculpt muscle, but support bone health, too.
To help you build strength without a single piece of gear, we asked top trainers to share their favorite equipment-free arm exercises and exactly how to do them. All you need is a little motivation—and maybe a towel to mop up the sweat.
Meet the experts: Tatiana Lampa, CPT, is a personal trainer, corrective exercise specialist, and founder of Training with T, a virtual training app. Corrine Carnation, CPT, is a personal and group fitness trainer and the creator of Better You, Better Living, a virtual training program.
How To Get The Most Out Of A No-Equipment Arm Workout
To get the most out of a no-equipment arm workout, you’ll want to focus on three key strategies:
- High reps
- Slow tempo
- Compound movements
“The best way to build arm definition with just bodyweight is repetition, consistency, and adding time under tension,” says fitness coach Tatiana Lampa, CPT. Since you’re not using external weight, aim to increase your rep count by two to six reps per set compared to what you’d typically do with dumbbells or resistance bands. This extra volume helps fatigue your muscles, which is essential for building strength and endurance.
Next, slow down your reps to increase time under tension. “Controlling the tempo of your movements maximizes the time your muscles are working,” says Lampa. For example, try lowering into a push-up for a slow count of three to five seconds, then press up quickly on a one-second count.
Lastly, choose compound bodyweight moves that engage your arms and surrounding muscle groups. The biceps and triceps don’t work in isolation—movements that also challenge your chest, shoulders, and core (like push-ups, plank variations, and triceps dips) are your best bet for building functional strength and visible definition.
Pro tip: If you want to make a bodyweight arm workout even harder, Lampa suggests adding time under tension, more reps, and less rest time.
A Simple No-Equipment Arm Workout For Women
There are plenty of ways to build arm strength and definition, but when you’re using only body weight as your resistance, “you’re going to need to be extra intentional and consistent,” says fitness coach Corrine Carnation, CPT. When not using external resistance, it takes some strategy to engage muscles and get the most out of each rep, including choosing the right exercises.
Carnation and Lampa put together a list of their top 10 bodyweight arm exercises to help you get started—all-levels, welcomed.
Time: 20 minutes | Equipment: None | Good for: Arms, back, chest
Instructions: For a full arm workout, choose six moves from the list below. Perform 12 to 20 reps of each, then continue to the next move without a break. When you finish all six, rest for 60 seconds, then repeat three more times for a total of four rounds. Even though these exercises are bodyweight-only, don’t forget to incorporate an upper-body warmup before getting into more intense exercises.
1. Push-Up
Why it rocks: Both Carnation and Lampa put this upper body staple at the top of the list. Push-ups hit all the major arm muscles while helping you target the chest and shoulder girdle (AKA your shoulder “core”). They build strength and stability in the shoulder while also serving as a great way to put important weight through the bones of the wrists, which are more prone to fractures as we age. Plus, they’re endlessly modifiable, making them great for beginners and pros. A classic push-up will always have its place, but there are tons of variations out there to explore—find a version that challenges you!
How to:
- Get on the floor in a plank position. Place your hands a little wider than a typical plank positioning, aligned with your chest.
- Brace your core and squeeze your glutes. Don’t allow your back to arch or cave downward.
- Bend your elbows to lower yourself towards the floor.
- Then, push up if you can. If not, use your knees to raise up and get back into the starting position. That’s 1 rep.
Modifications: knee push-ups, wall push-ups, incline push-ups
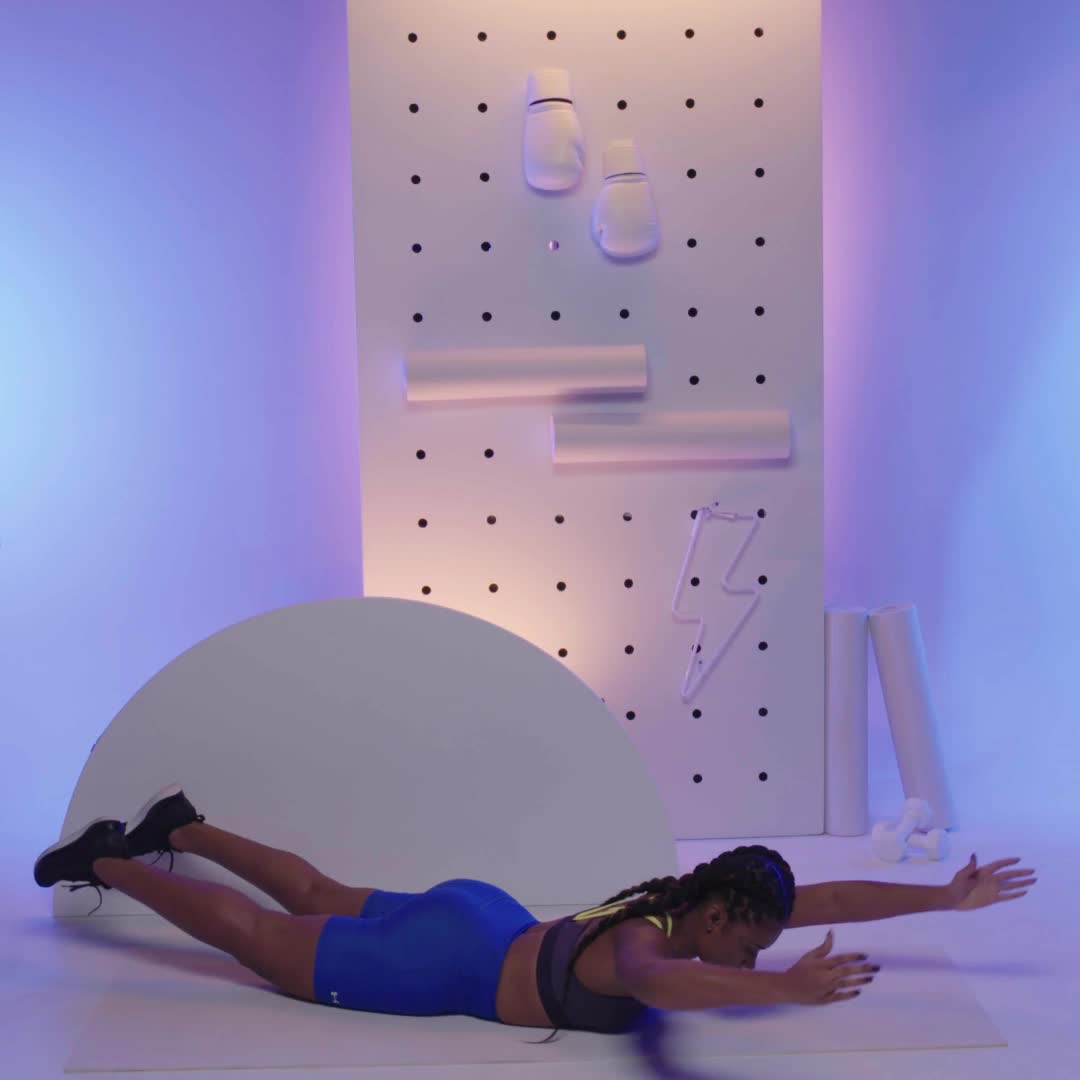
2. Superman
Why it rocks: You’d be surprised how much lying on your stomach and lifting your arms against gravity makes you work. This prone (on your stomach) arm burner does just that, targeting the muscles on the back of the arms and shoulders, including the triceps, lats and shoulders. Think you’re not lifting any resistance? The weight of your arms (which, combined, is about 10 to 12 percent of your total body weight) acts as the resistance.
How to:
- Lie on your stomach with your arms (overhead) and legs fully extended while keeping your head relaxed and spine neutral by looking at the floor in front of you instead of up.
- Contract your core muscles to stabilize your spine, while simultaneously raising both your legs and arms a few inches off the ground, keeping your head and neck neutral.
- Hold at top for 3 to 5 seconds.
- Gently lower yourself back to the starting position. That’s 1 rep.
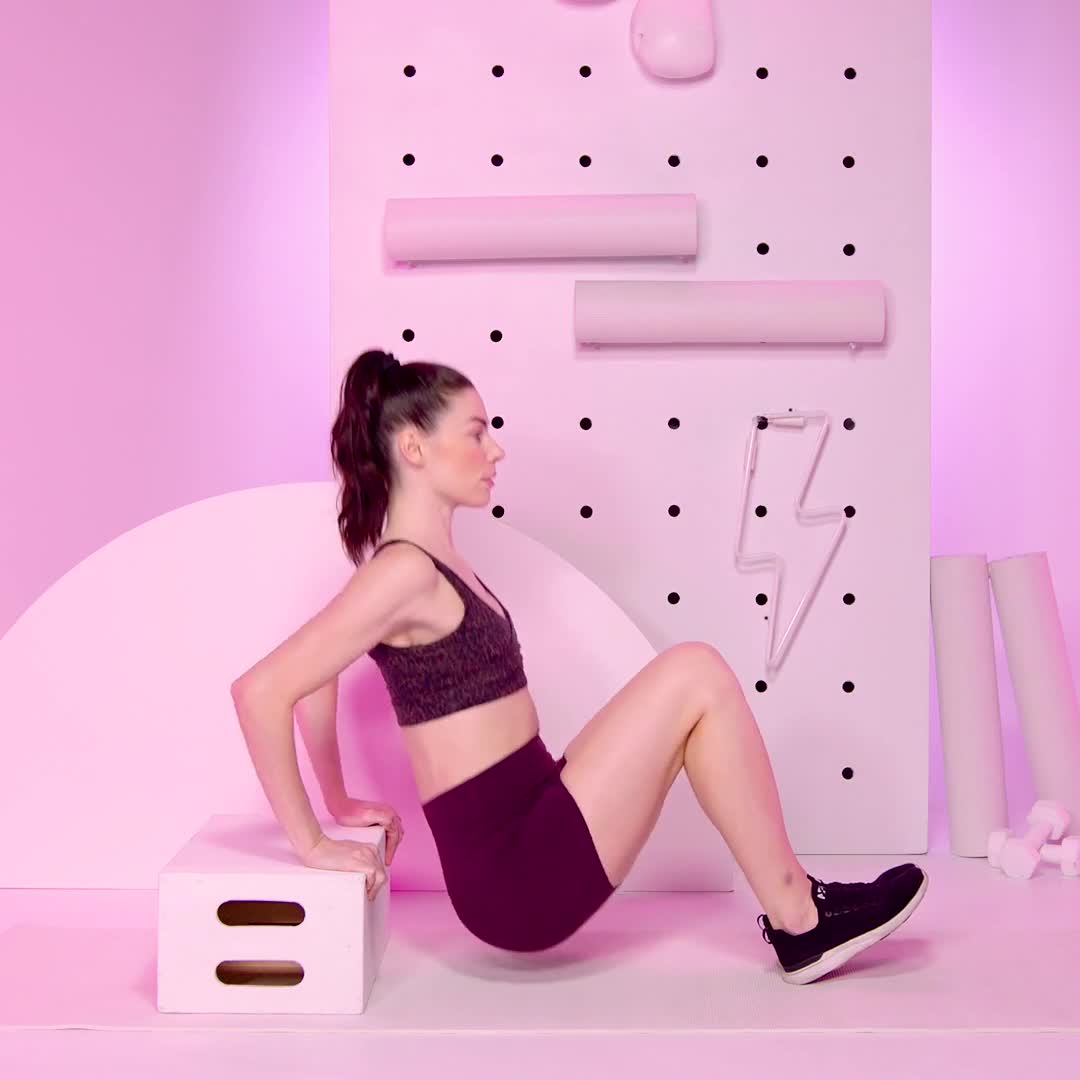
3. Triceps Dip
Why it rocks: As the name suggests, these mainly target the triceps—the muscles on the back of your arm that are important for straightening the elbow and pushing your body away from the floor. Chest and shoulders are also involved.
How to:
- Sit in a chair and grip the front edges of it with both hands.
- Scoot butt forward until it’s hovering just off the seat and legs form 90-degree angles and straighten arms.
- Lower body down until elbows form 90-degree angles.
- Engage the back of your arms to press back to start. That’s 1 rep.
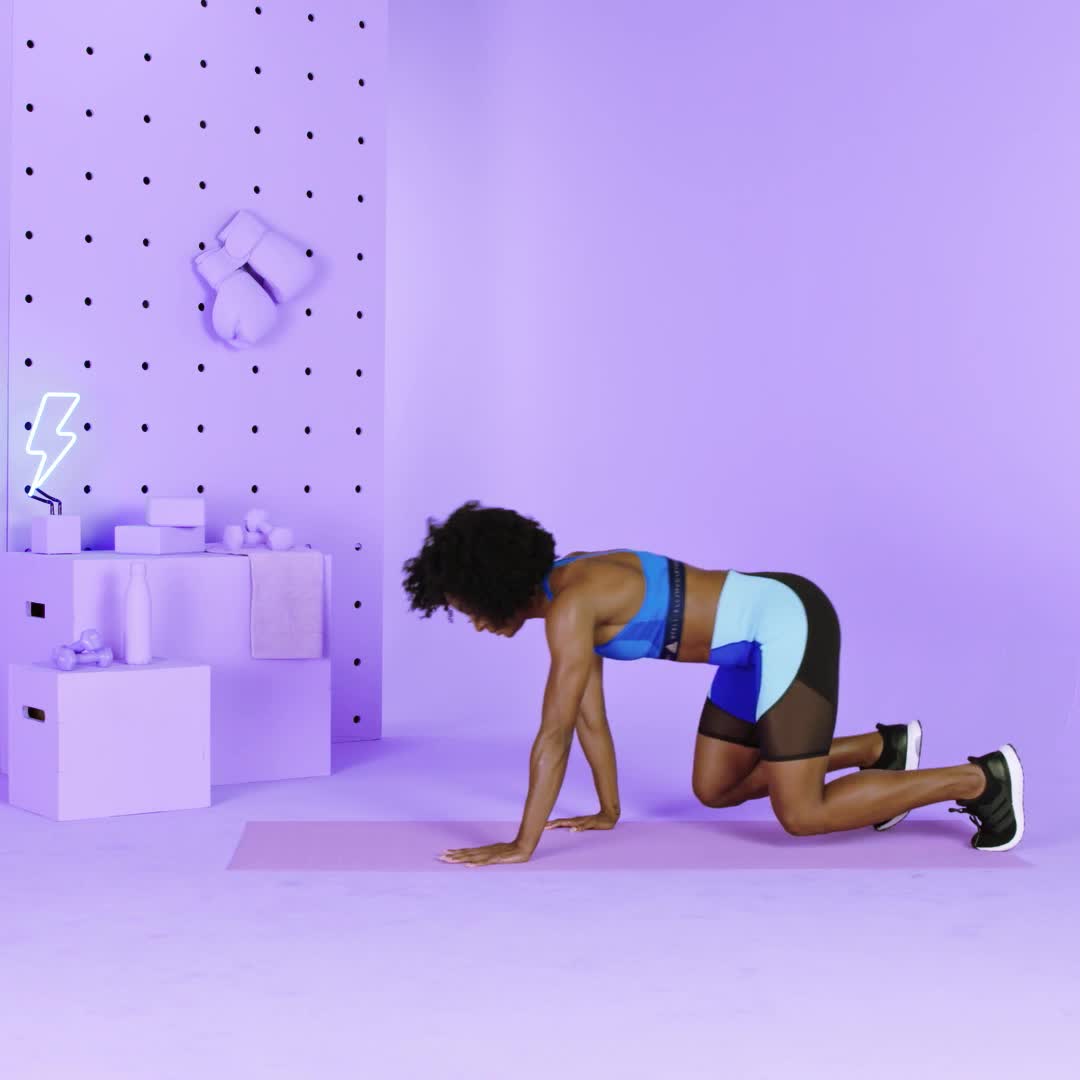
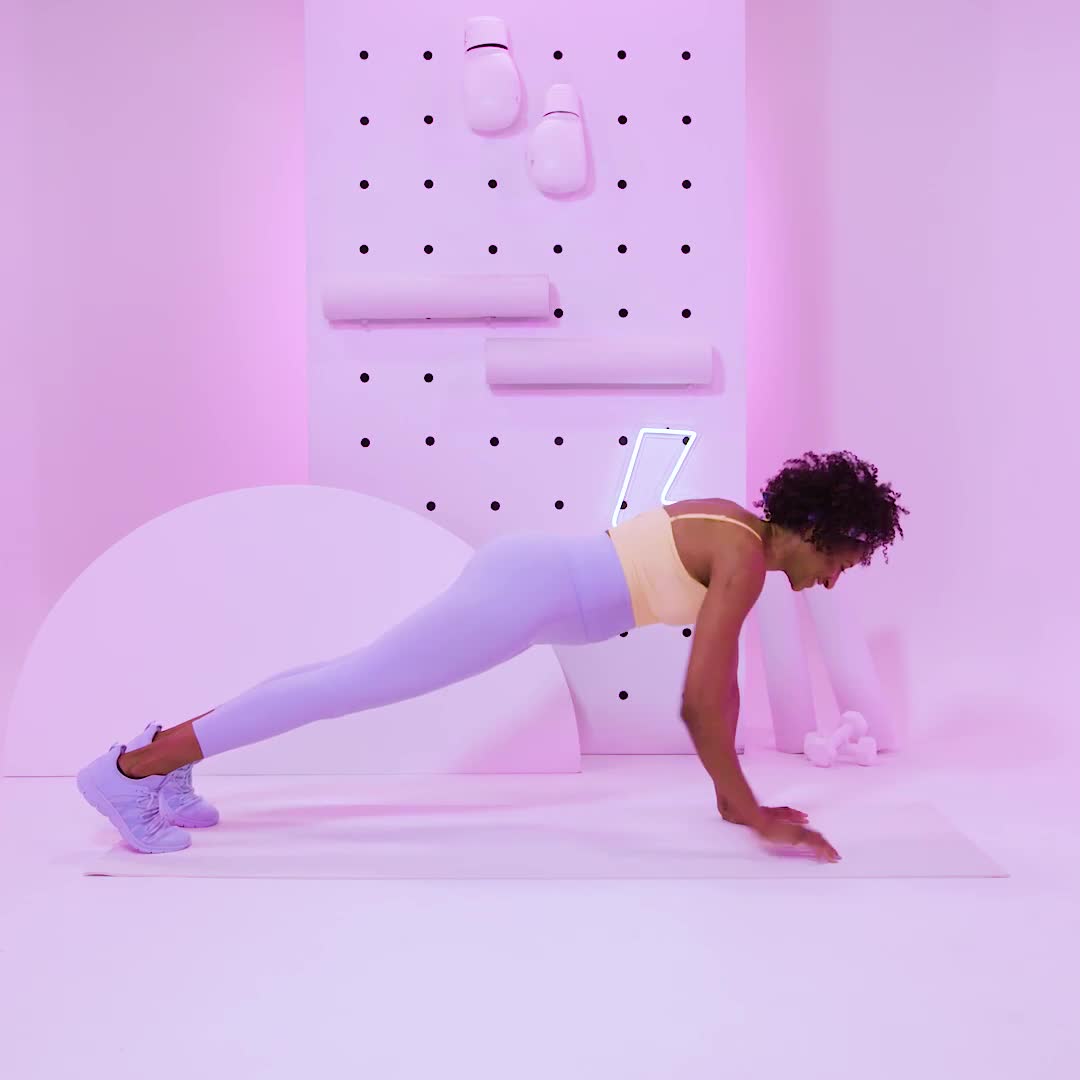
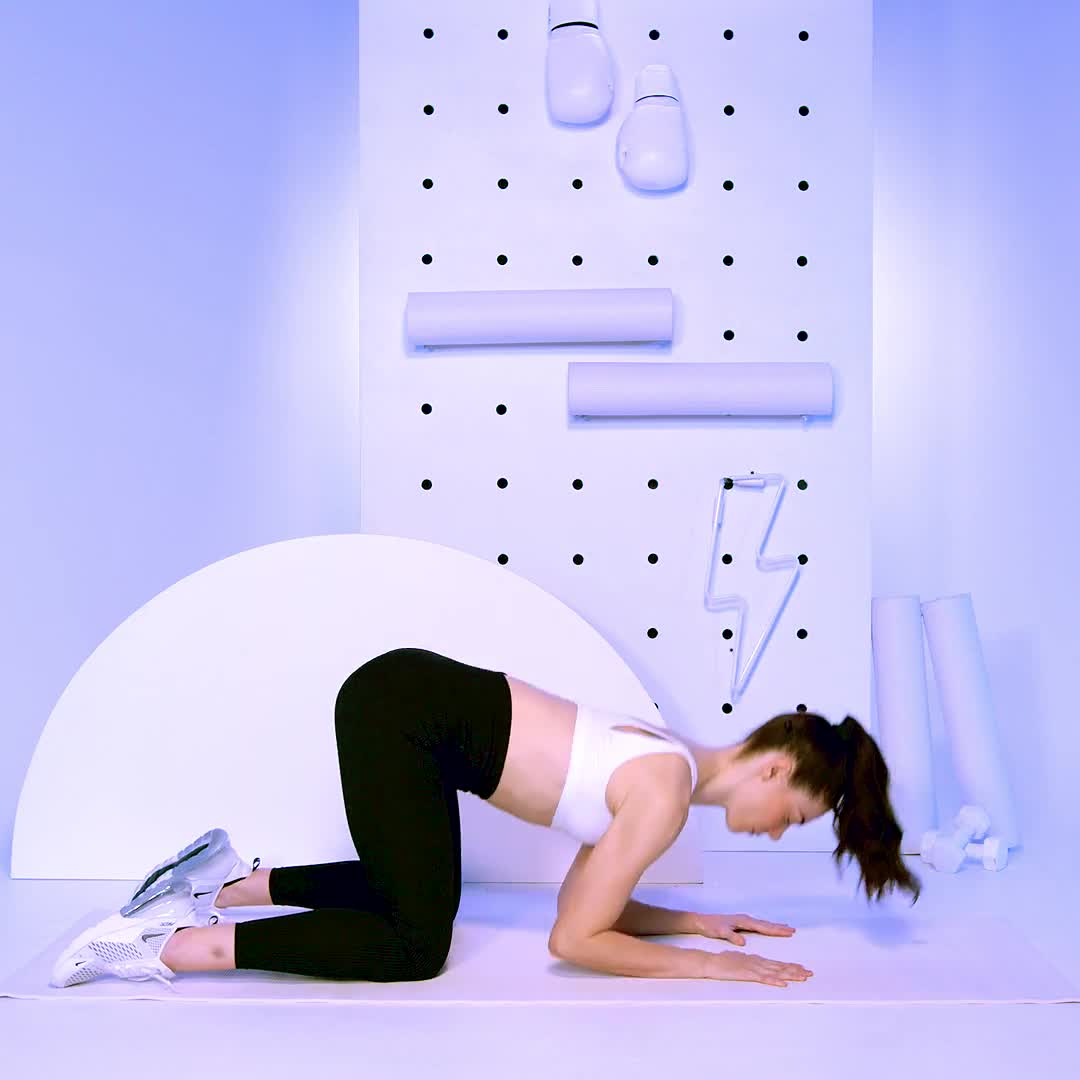
4. Bear Crawl
Why it rocks: We love an arm exercise that also hits multiple larger muscles in the core, chest, shoulders. The bear crawl does just that, combining full-body movement with an exercise that requires strength and endurance in the arms.
How to:
- Get on all fours into a table top position with shoulders stacked over wrists and hip directly over knees. Engage your lats (the muscles on your back below your armpits that you’d feel if you gave yourself a hug) and maintain a neutral spine.
- Now, hover your knees slightly off the floor.
- Next, move your left hand and right knee slightly forward while keeping your hips parallel to the floor and maintaining a neutral spine. Then, do the same thing with your other hand and knee so that you meet back in quadruped position.
- Reverse the movement to return to start. That’s 1 rep.
Form tip: Widen your stance to help stabilize your hips, if needed. “Imagine you’re balancing a glass of water on your back and you don’t want to spill it,” says Lampa.
5. Plank Up Downs
Why it rocks: This high-to-low plank combo doubles the intensity by combining the two isometric moves for a dynamic upper body burn. It also forces you to isolate each arm–a sneaky way of increasing resistance without changing the resistance itself. This combo move targets the chest, arms, core and shoulders, and to add to the challenge, you get to decide how long you hold each phase of the plank.
How to:
- Start in a high plank with back flat and shoulders over wrists.
- Lower right forearm to the mat.
- Lower left forearm to the mat, and pause in the forearm plank position.
- Place right hand on the mat, and press to straighten right elbow.
- Place left hand on the mat and press to straight left elbow into high plank. That’s 1 rep.
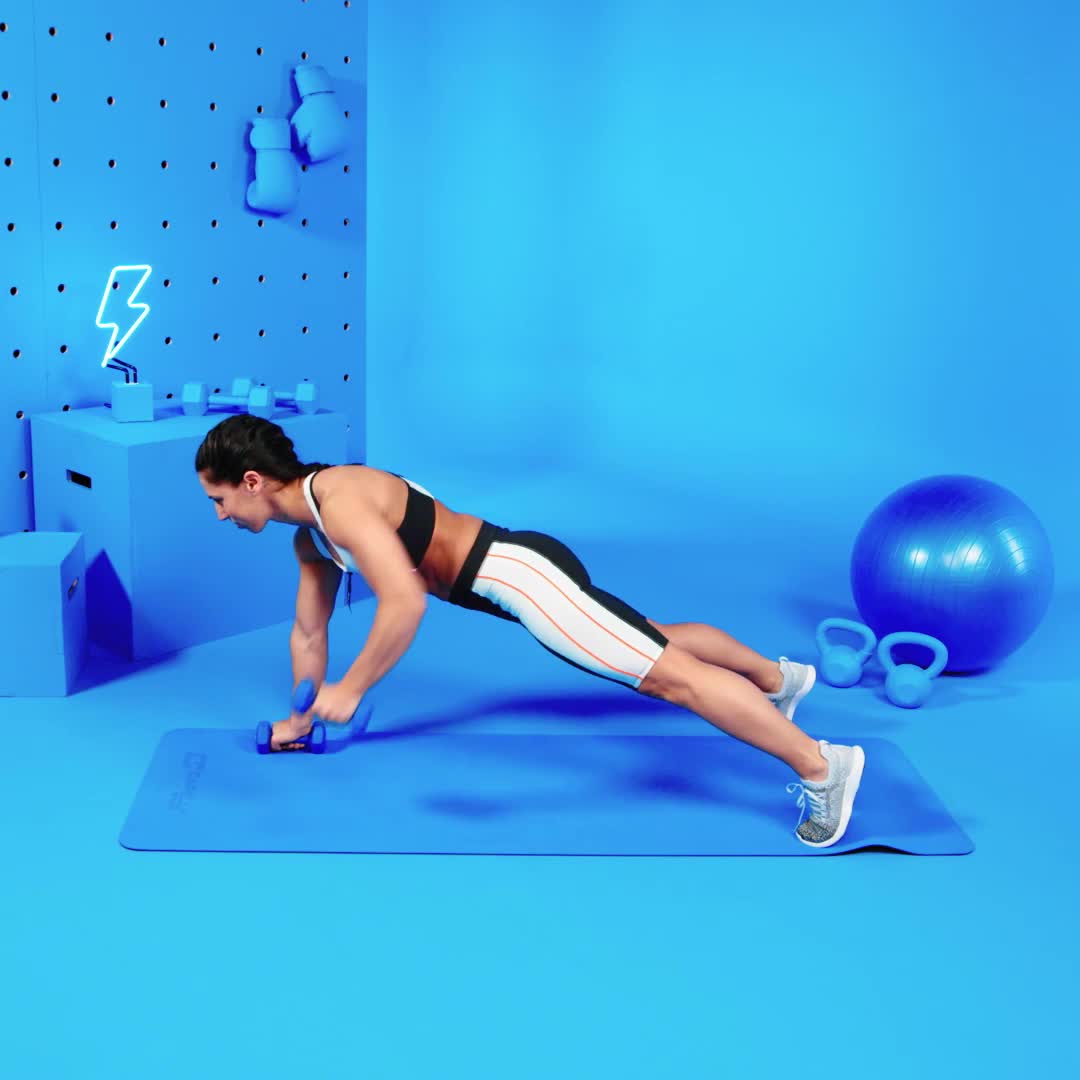
6. Renegade Row
Why it rocks: This plank spinoff hits the back of the arms and shoulders for an extra kick (or punch?) or muscle activation. By combining the static burn of a plank with the scapular retraction movement of a row, you can hit the arm and shoulders from all angles. Isolated unilateral weight-bearing through each arm adds resistance to help create muscle definition.
How to:
- Place your hands on the floor, shoulder-width. Assume a plank position with your feet wider than shoulder-distance apart.
- Drive your right arm through the palm into the floor, engage from head to toe, and row the left arm up and to the side of your rib cage—your elbow should be pointed up and back. Keep your body stable as you slowly lower your hand back to the floor. Repeat on the other side. That’s 1 rep.
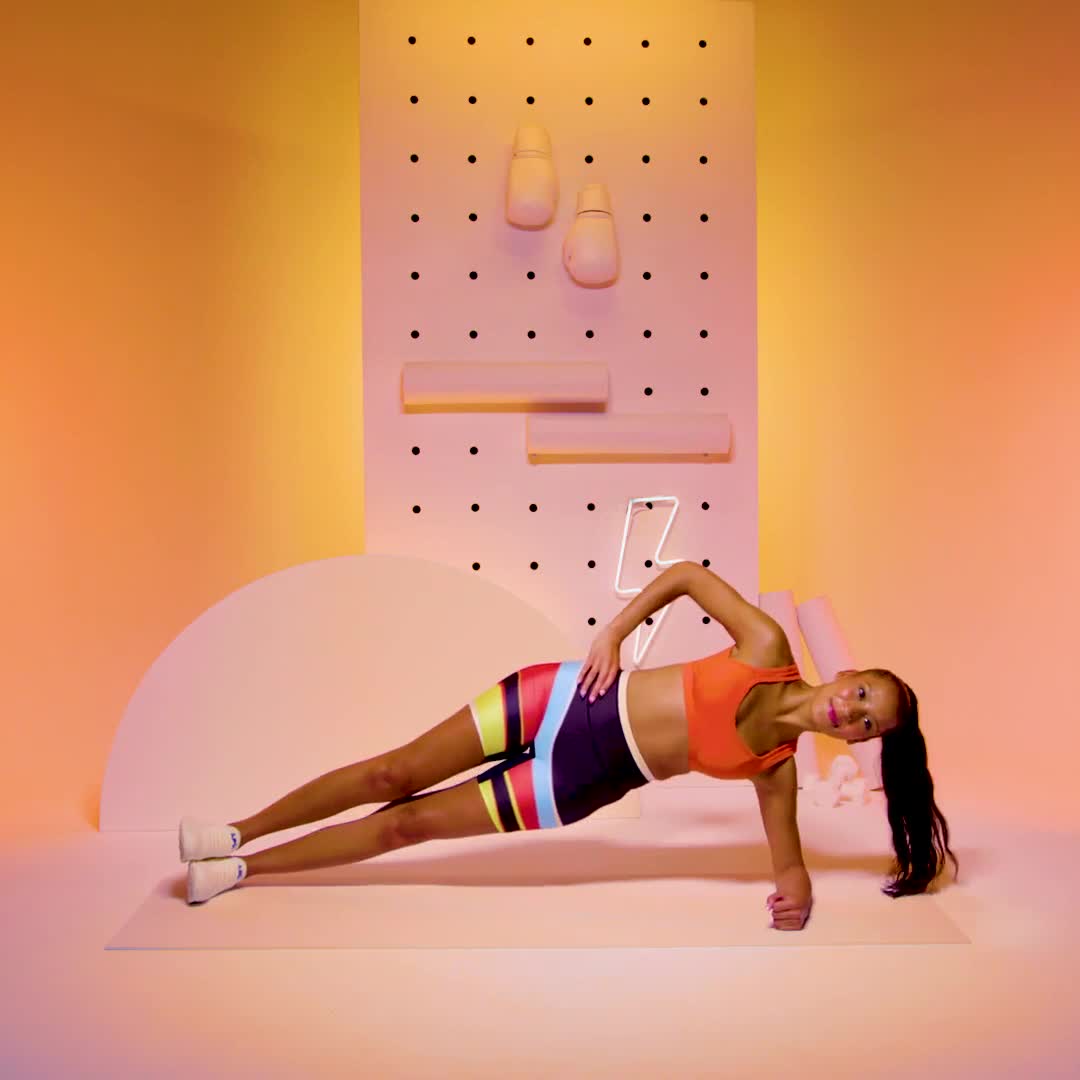
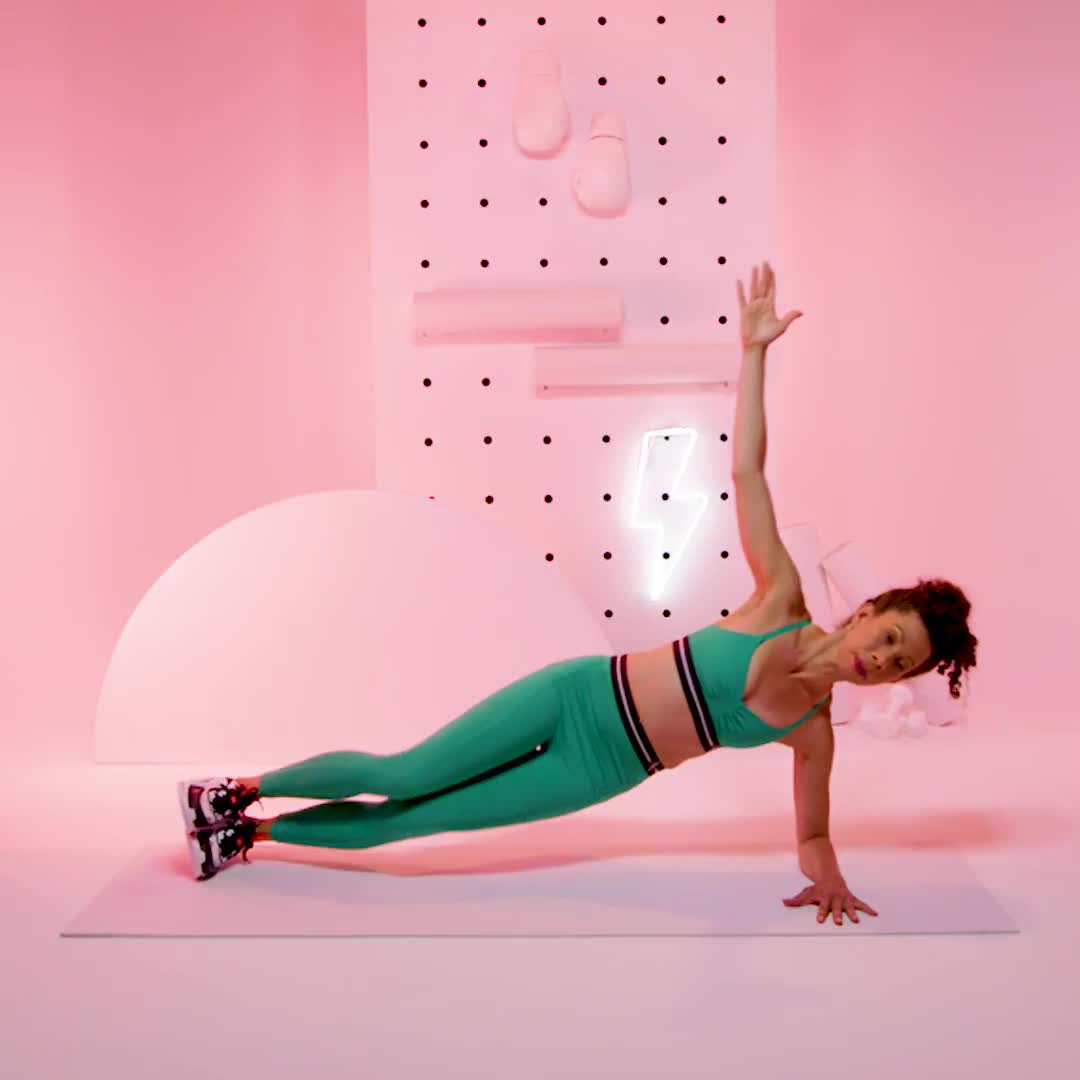
7. Forearm Side Plank
Why it rocks: Side planks fire up your obliques, shoulders, and glutes all at once, while also building serious core stability. Bonus: It challenges your balance and posture in one go.
How to:
- Start lying on right side with left hand on hip, right arm bent at 90 degrees and forearm flat on the floor so elbow is beneath right shoulder—legs extended with left on top of right, feet flexed.
- Engage core, press right palm into floor, and lift hips up into air until body forms a straight line.
- Hold the position, then switch sides.
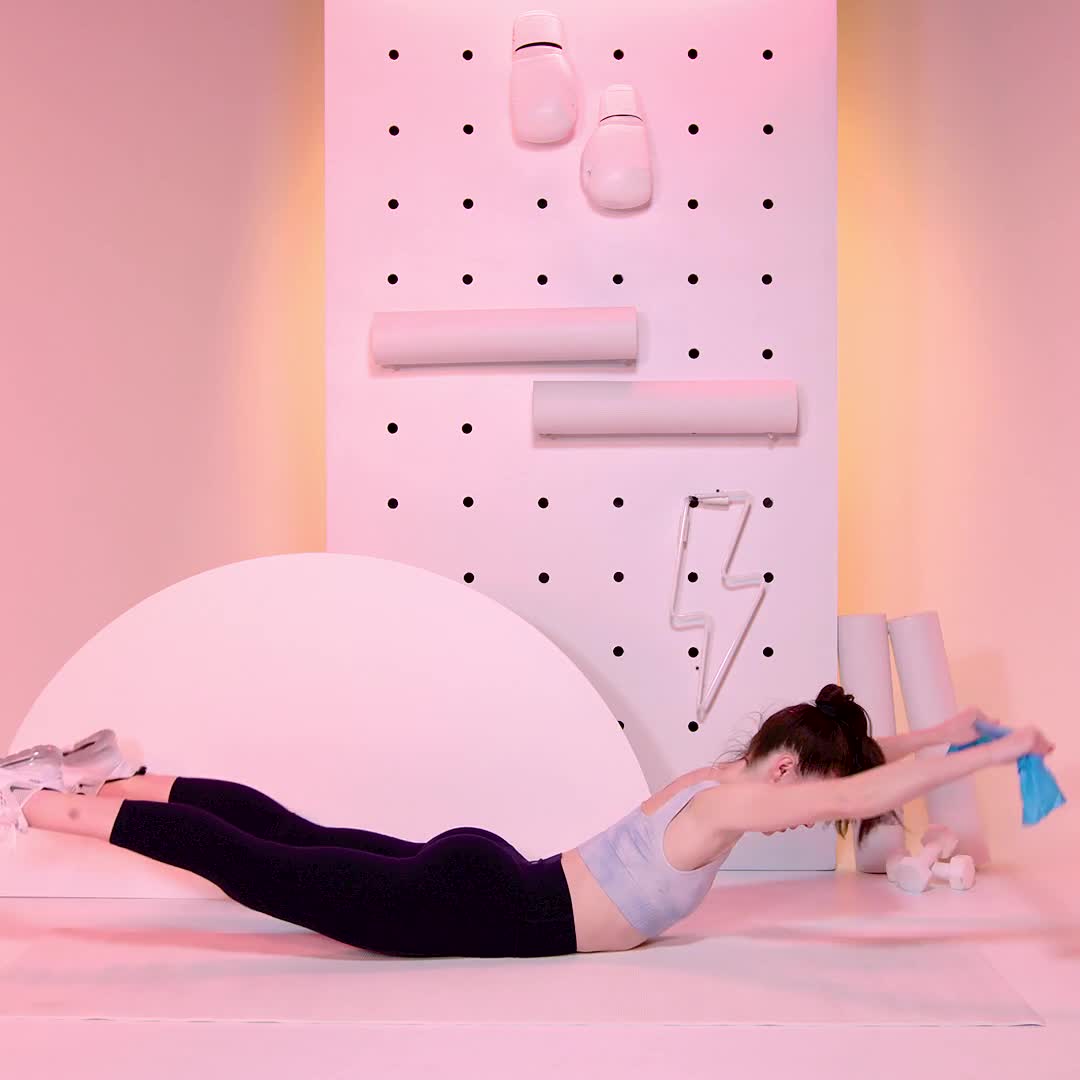
8. Superman To Pulldown
Why it rocks: Just like the classic Superman, this move hits muscles in the back of the arm and middle of the shoulder blades using the weight of your own arms as resistance. This simple move is great for upper body endurance and posture.
How to:
- Lie facedown with arms extended in front of you and legs behind you. Keep palms facing down.
- Lift legs and arms at the same time (pretend you’re being stretched like a piece of taffy).
- Hold this position as you bend arms, squeeze shoulder blades together, and bring elbows to sides to create a “W” shape with upper body. (Note: band shown above is not necessary to make this move worthwhile!)
- Reverse the movement and bring arms forward.
- Lower body back down to the starting position. That’s 1 rep.
9. Triceps Circle
Why it rocks: This sneaky burner lights up your triceps without any equipment by keeping constant tension on the muscle. Small, controlled circles = big-time arm fatigue and sculpted definition.
How to:
- Start on all fours with knees under hips, hands under shoulders, and spine neutral.
- Bend elbows to lower forearms and chest to almost touch the mat.
- Skim the mat with torso to bring nose past hands.
- Push into the mat with hands to extend arms to return to start. That’s 1 rep.
10. Side Plank Thread The Needle
Why it rocks: This sneaky core crusher targets way more than your shoulders—it works your obliques, upper back, and even your glutes—all while challenging your shoulder joint’s strength and stability.
How to:
- Start in a side forearm plank position, with left forearm on floor, parallel to top of mat, elbow under shoulder, right arm extended straight in air at shoulder height, feet staggered and flexed.
- Rotate body forward toward mat and thread right hand between torso and mat.
- Reverse the motion to return to start. That’s 1 rep. Complete all reps, then switch sides and repeat.
How To Add This No-Equipment Arm Workout To Your Routine
It’s a good idea to incorporate a variety of upper body exercises into your workouts regularly. Aim to work your arms two to three times a week, using a mix of bodyweight and free weight exercises. “If you’re looking to maximize time, AMRAP (as many rounds as possible) or EMOM (every minute on a minute complete “x” amount of reps” are the best approach,” says Lampa. “You can always start with the basics of 3 sets of 10 then build your reps and intensity from there.”
You can either pick and choose a few exercises to incorporate into a full-body or upper-body workout, or dedicate a few sessions per week to target upper-body muscle groups. That could look like:
- Upper-body day 1: Back and biceps
- Upper-body day 2: Chest and triceps
- Upper-body day 3: Shoulders
Or
- Upper-body day 1: Back, biceps, triceps
- Upper-body day 2: Chest and shoulders
After six to 12 weeks of doing the same schedule, it’s time to switch up your programming to continue challenging your muscles, Lampa previously told WH.
Want to add resistance to your routine? Check out these workouts:

Rachel Tavel is a doctor of physical therapy, strength and conditioning specialist certified by the National Strength and Conditioning Association, and writer. Her writing has been published in Forbes, Fortune, Men’s Health, Women’s Health, Runner’s World, SELF, Bicycling Magazine, The Huffington Post, and more. She co-authored the book “Stretch Yourself Healthy Guide: Easy Routines to Relieve Pain, Boost Energy, and Feel Refreshed” (Prevention, 2020) and is a Forbes Health Advisory Board Member. Prior to becoming a physical therapist, Rachel was a travel writer living and traveling throughout South America. Connect: , , Email: .
Read the full article here